Effective data management is crucial for making informed decisions and driving success. Smartsheet’s powerful filtering capabilities allow you to quickly and easily sort through your data, giving you a focused view of the information that matters most. In this edition of the Smartsheet Learning Series, we’ll guide you through the process of creating, managing, and sharing filters, empowering you to harness the full potential of your data.
The Benefits of Filters in Smartsheet
Filters are a game-changer when it comes to organizing and analyzing your data. By leveraging filters, you can:
- Focus on Relevant Data: Filters allow you to display only the rows or columns that meet specific criteria, helping you focus on the most relevant information.
- Enhance Collaboration: Shared filters enable team members to view and analyze data from a consistent perspective, fostering better collaboration and decision-making.
- Improve Efficiency: By quickly narrowing down your data view, you can save time and increase productivity, enabling you to make faster, more informed decisions.
- Maintain Data Integrity: Filters provide a way to explore and analyze your data without modifying the underlying dataset, ensuring data integrity.
Step-by-Step Guide to Creating a Filter in Smartsheet
Step 1: Access the Filter Tool
Within your Smartsheet, navigate to the tool ribbon at the top of the screen and click the “Filter” button. You will be presented with a filter prompt, where you can name and configure your filter settings.
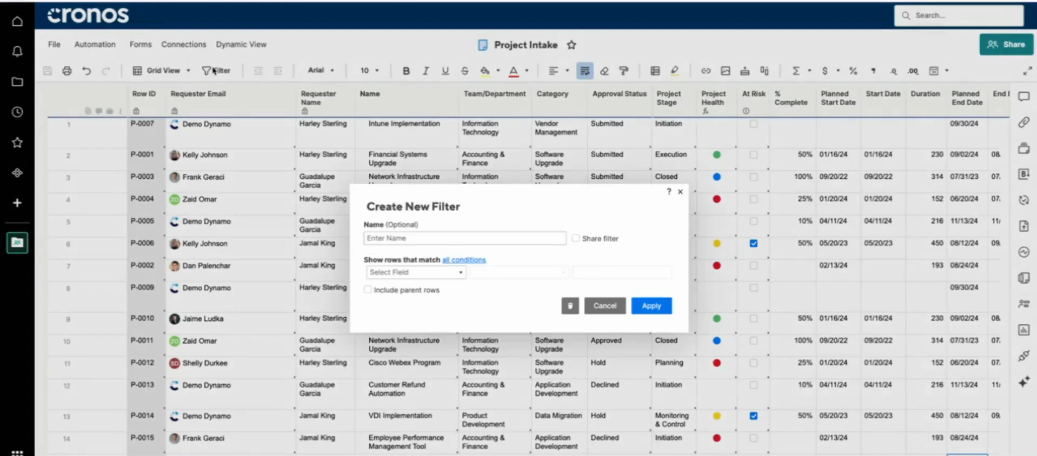
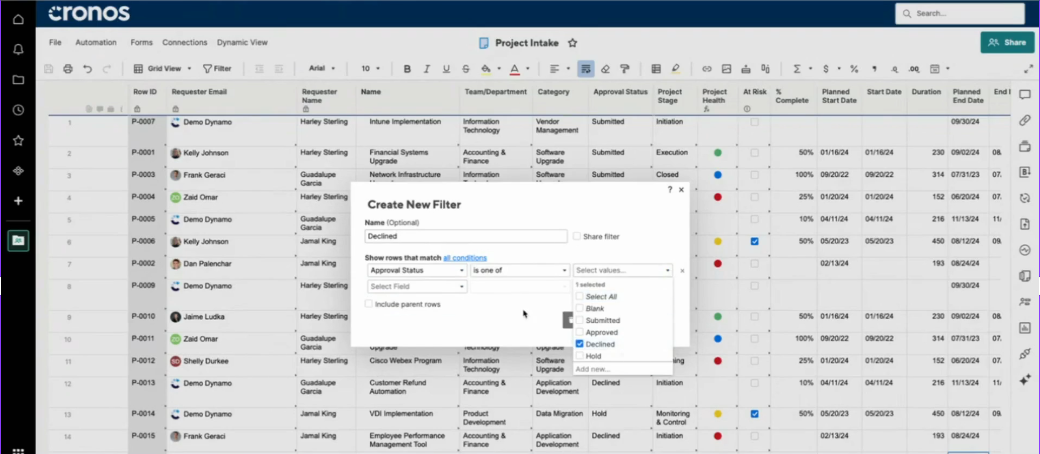
Step 2: Configure Filter Settings
In the filter prompt, specify the criteria for your filter. You can filter based on various conditions, such as text, numbers, dates, or formulas. Additionally, you can share your filter with team members by clicking the “Share Filter” option within the prompt.
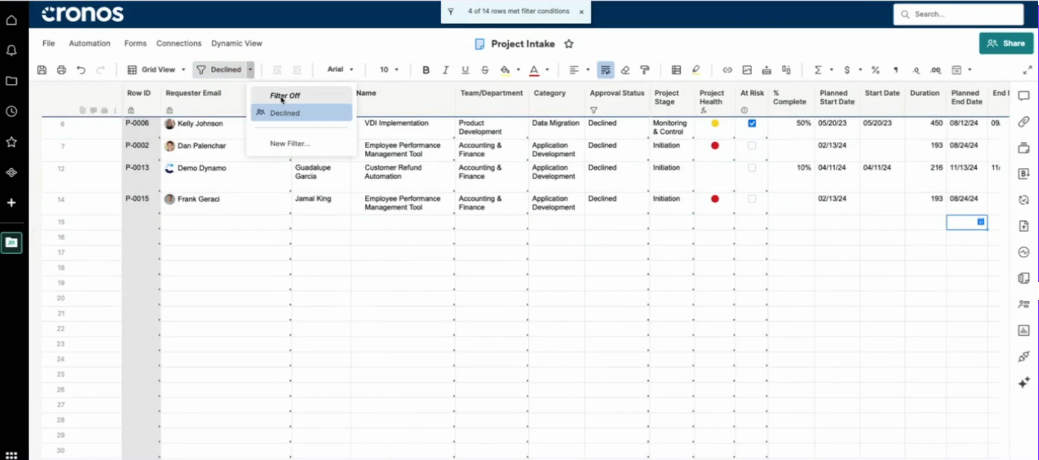
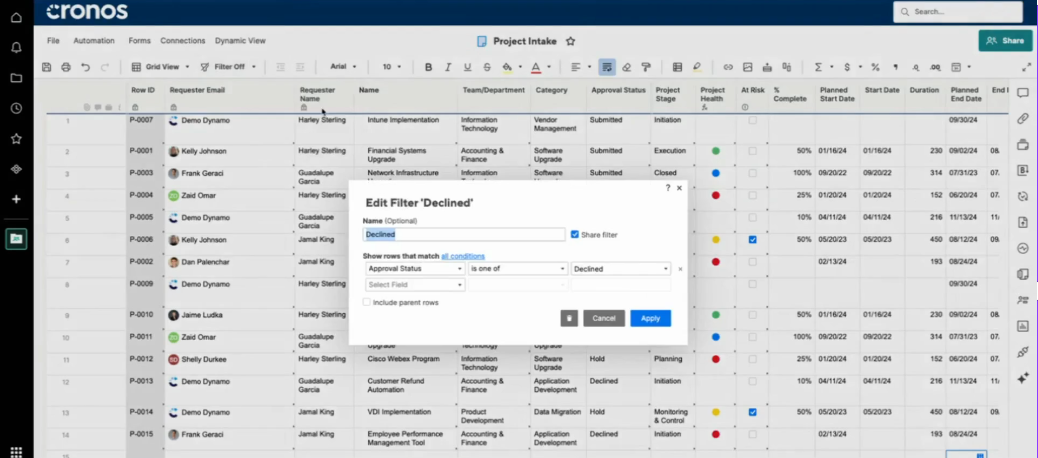
Step 3: Apply or Modify Filters
To apply a filter, simply click the “Filter” button in the tool ribbon. To turn off a filter, click the dropdown arrow next to the “Filter” button and select “Filter Off.” To modify an existing filter, click the dropdown arrow, locate the filter you want to modify, and select the pencil icon next to its name. Adjust the prompt settings as desired.
By incorporating filters into your Smartsheet workflow, you can unlock a new level of data organization and analysis, enabling you to make informed decisions and drive success. Follow the simple steps outlined in this blog post, and take control of your data, streamlining your processes and enhancing collaboration across your team.
For more Smartsheet tips and tricks, be sure to check out our Smartsheet Learning Series at www.cronoscg.com or follow us on social media.How to Create Filters in Smartsheet