
Collecting accurate and organized information is crucial for businesses to make informed decisions and drive success. Smartsheet’s powerful form creation capabilities allow you to design custom forms tailored to your specific needs, streamlining data collection and ensuring data consistency across your organization. In this edition of the Smartsheet Learning Series, we’ll guide you through the step-by-step process of creating a form, empowering you to gather data efficiently and effectively.
The Benefits of Custom Forms in Smartsheet
Customized forms offer numerous advantages over traditional data collection methods, including:
- Improved data quality: By defining required fields and adding validations, you can ensure that the collected data meets your standards and requirements.
- Enhanced user experience: Well-designed forms with clear instructions and conditional logic provide a seamless experience for users, reducing errors and increasing engagement.
- Streamlined data management: Collected data is automatically organized and stored within your Smartsheet, eliminating the need for manual data entry and reducing the risk of errors.
- Increased productivity: By automating the data collection process, you can save time and focus your team’s efforts on more strategic tasks.
Step-by-Step Guide to Creating a Form in Smartsheet
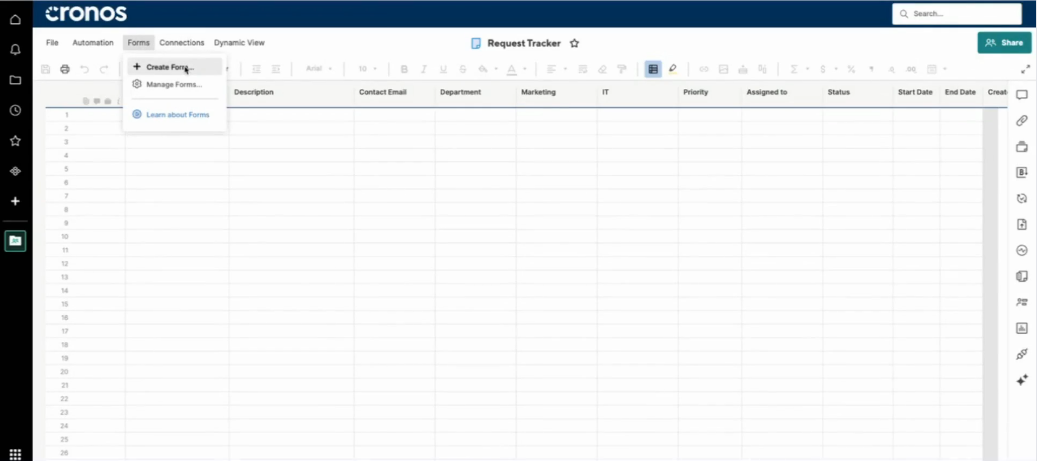
Step 1: Access the Form Creation Tool
Within your Smartsheet, navigate to the top left of the screen and click the “Forms” button. Then, select “Create Form” from the context menu.
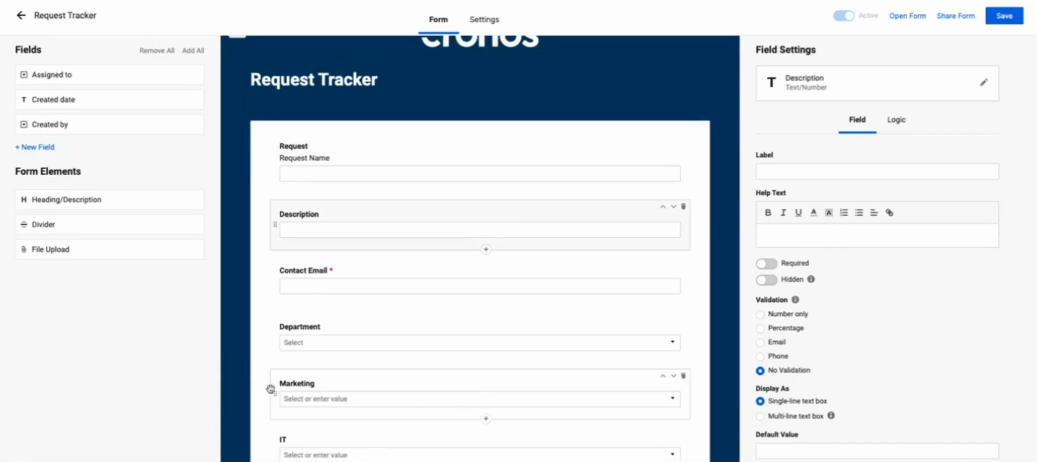
Step 2: Customize Your Form
In the form builder, you can add or remove fields, provide field context, and mark fields as required. Customize the form to meet your specific data collection needs.
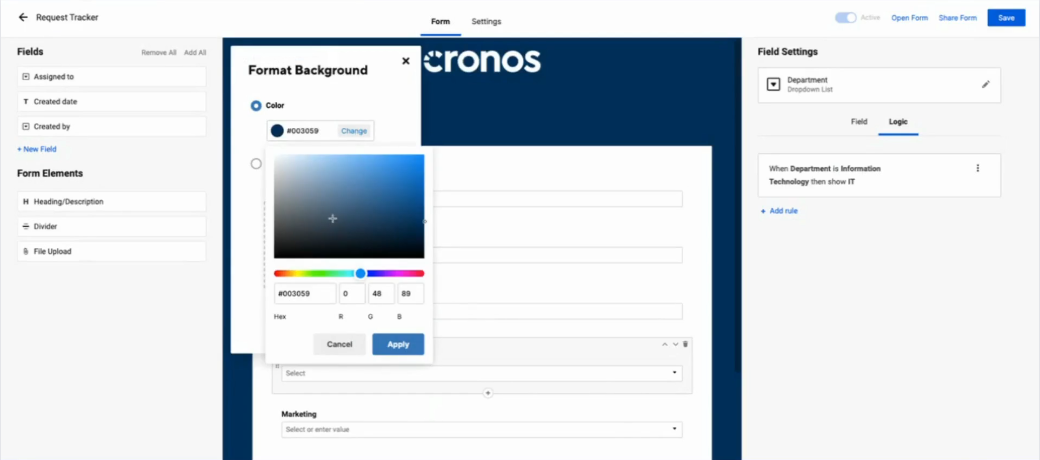
Step 3: Add Conditional Logic (Optional)
To enhance the user experience and ensure data accuracy, you can add conditional logic to your form. Select a field, choose the “Logic” option within the field settings, and set up your conditional logic requirements. This will dynamically display or hide fields based on user responses, guiding users through the form intelligently.

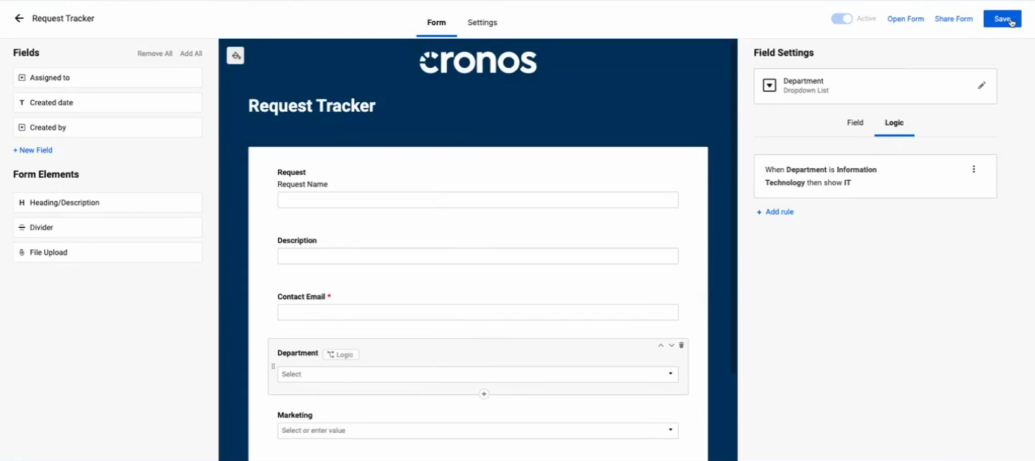
Step 4: Brand Your Form (Optional)
To reinforce your brand identity, navigate to the top left corner of your form and select the “Format Background” option. Here, you can change the background colors and add your company logo, creating a consistent and professional look.
Step 5: Save and Share
Once you’ve customized your form to your liking, don’t forget to save your changes. You can then share the form with your team or stakeholders, enabling efficient data collection across your organization.
By leveraging Smartsheet’s form creation capabilities, you can revolutionize your data collection processes, ensuring data accuracy, improving user experience, and streamlining workflows. Follow the simple steps outlined in this blog post, and unlock the full potential of custom forms for your business.
For more Smartsheet tips and tricks, be sure to check out our Smartsheet Learning Series at www.cronoscg.com or follow us on social media.